
$BET mint curve
The flat-then-ratchet curve that turns LP gain into $BET supply. Early activity mints at a constant rate including from underwater LP; later activity mints asymptotically less.
The shape
The curve has two regions, parametrised by four constants in the tokenomics program:
-
Flat region (when
trackedLpUsd < lpFlatThresholdUsd): mint rate is the constantflatRate = 100 $BET per $1 of LP gain. -
Ratchet region (when
trackedLpUsd ≥ lpFlatThresholdUsd): rate decays as the high-water-mark of cumulative LP gain past the threshold (tailProgressUsd) grows. The closed-form rate at HWMHis:rate(H) = flatRate · (S / (S + H))²where
S = tailDecayScaleUsd.
Live defaults: lpFlatThresholdUsd = $2M, flatRate = 100, tailDecayScaleUsd = $120M.
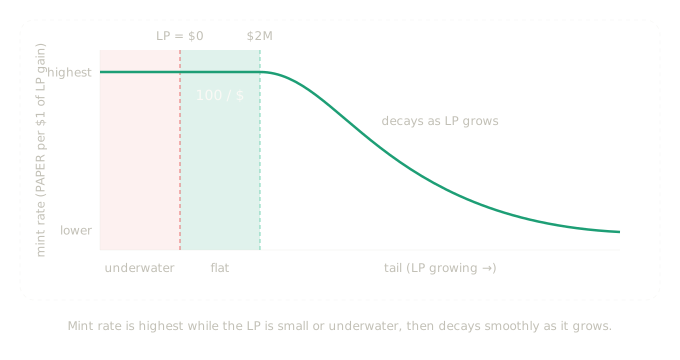
Marginal mint rate vs LP balance with defaults flatRate=100, threshold=$2M, S=$120M. The insolvent region (LP < 0) and the flat region both mint at the full 100 $BET/$; the tail decays as 100 · (S/(S+H))² where H = trackedLpUsd − $2M.
Strict-monotone ratchet
tailProgressUsd is a strict high-water-mark: staker drains debit trackedLpUsd but do not reduce tailProgressUsd. Once the cumulative tail-region gain has advanced, the rate is permanently decayed by that amount. Concrete consequence: cumulative tail-region LP gains of $100M ⇒ HWM stays at $100M ⇒ the rate is now 100 · (120/220)² ≈ 30 $BET/$ regardless of how often the LP got drained to stakers in between.
Early traders mint at materially higher rates than late traders. By design.
What counts as "loss"
The mint basis is the LP's actual gain from a losing settlement, not the user's raw loss. On a solvent loss settlement the 2% loss-branch fee is carved from the LP's side, so the LP gains rawLoss − fee, and that's what advances the curve. About 2% of the user's loss routes to stakers/dev rather than mint.